I recently wrote about a new technique for created in a nymph body with breathing gills along the sides.
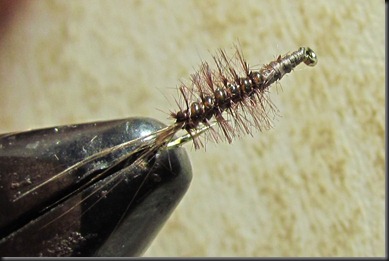
In more recent weeks, I have been working up a few more variants and exploring the concept further.Fly tiers will know that such experimentation is a frustrating thing in many respects. You end up with several disasters before you get anything worthwhile. Materials are not as fine as you thought they would be, or not quite subtle enough, or too slippery to bond against, and so it goes; and you end up with little film canisters of tangled cast offs, of zero value to the fisherman in you.
We have a long awaited fishing trip coming up shortly, and instead of stocking up my boxes, I am “wasting” hooks and tying materials experimenting.
But when you get it right, it is all worth it.
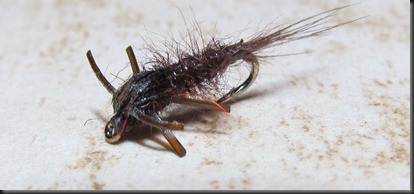
I don’t know that I have the gilled body nymph right yet, but I have succeeded in incorporating more translucence, and sparkle into the pattern.
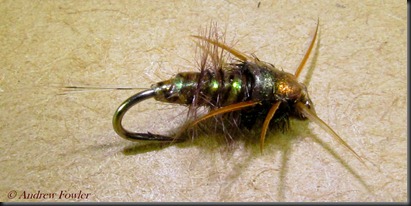
My first attempts were a little dark and dull, and lacked the “light” that I wanted.
To solve this, I assembled my materials with light and translucence in mind:
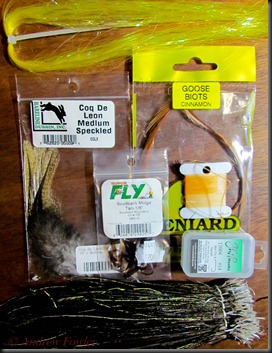
I went with a v-rib that was much lighter in colour, and which therefore showed off it’s translucence a whole lot better.
With some light shining through the body, this then gave me an opportunity to incorporate some dazzle and colour from within the nymph body. I did this with various shades of Hends body quill, and Flashabou or Krystal Flash. To moderate the flash just a little, one option is to twist a strand of coloured flashabou and one of black krystal flash. Copper and black gives you a really juicy natural look, that peers at you from beneath the V-rib. The colour is there, but so is a buggy darkness that you see in a natural insect when it wriggles on the palm of your hand.
For the legs, I had previously used V-Rib. This has good volume, but it lacks a certain natural bugginess. I tried some rubber legs, but they are a little square.
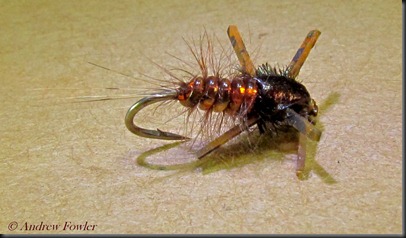
So I replaced this with Goose Biots, which somehow look more natural. I have since acquired some micro rubber legs, which I have plans for.
Then to add more sheen in the thorax area, I switched from turkey to scud back material.
What we now have is a fly that lets in more light, and shows promise of a little more sheen and liveliness, but still with the ostrich herl gills down either side.
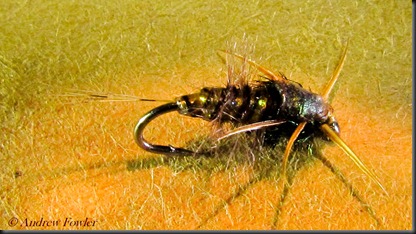
Perhaps you have some ideas to contribute to this evolving pattern?
7 Responses
No contribution here, except to say that these nymphs are very nicely tied. My own experience with the realistic flies is that they work less well than “buggier” impressionistic patterns that are easier to tie. But that’s just me. I’m not that great a tier.
Nice ideas, personally I would go for ostrich herl or even just the good ol’ loose dubbing and ripping it up with some velcro. But I agree with your comments, sometimes experimentation is time consuming so I tend to have “experimental sessions” and “production sessions” at the vice. I know that I should attack those film cannisters with a razor blade and get the hooks back but somehow I rarely seem to get around to it. 🙂
I liked all the examples. I think they will all catch.
Thanks for all the comments. I didnt repeat it here, but of course the gills I refered to in the earlier post ARE of course made of Ostrich herl. I have also since found others have have done very similar things before. One is Oliver Edwards, who has tied a “Heptagenid nymph” in his book “Oliver Edwards’ Master fly tyer class (pg 33). The other is fellow blogger “Featherbender.com” who has used Ostrich sunk into a melted glue body, in the case of a Caddis pattern, but also in a Mayfly pattern. (the Nympho Maniac mayfly nymph, posted Nov 2012).
My friend Roy has also mailed me with news of a fly named the “V Bug” in a back issue of the magazine ‘Fly-fishing and Fly-tying’, which apparently has somethng similar incorporated.
It seems nowadays in fly tying, if one searches hard enough, you will find that someone has invented exactly what you have invented 🙂 .
The other element of this technique was to get an exco skeletal body: something that all my quick tie general nymphs with dubbed bodies don’t attempt to imitate. The smooth “exo body” idea also makes for a fly that traps less air and sinks faster, but without sacrificing gill movement.
I suspect that this is all more important to us at the vice than to the Trout in the stream, but I am having fun along the way.
Have you tried pulling rhea tail along both sides and wrapping your thread thru the D-Rib as you worked your way up the fly to the thorax as in this photo? I have had success with this technique on my caddis larvae.
https://www.facebook.com/photo.php?fbid=10151136215002003&set=pb.106853842002.-2207520000.1378071013.&type=3&theater
I also use this technique on my CDC Callibaetis, though I am using ostrich herl.
https://fbcdn-sphotos-h-a.akamaihd.net/hphotos-ak-frc1/901661_10151323829332003_266852541_o.jpg.
You might also try using a Potters Weave on both sides of your nymph.
I use this technique for my Hot Spot Sow Bug. It is the only way I could get the legs to stick out from the sides instead downward on a scud.
https://sphotos-a-dfw.xx.fbcdn.net/hphotos-ash2/281425_10150255132842003_238548_n.jpg
Thank you for these very useful links. I also stumbled upon a very clever method on the internet recently, which I am adapting and will write about soon.
The method that I wrote about, and which I discovered on the internet, is covered in the following post on Tom Sutcliffe’s website: http://www.tomsutcliffe.co.za/fly-fishing/fly-tying/item/833-tying-gill-bodied-nymphs-text-and-images-by-andrew-fowler.html