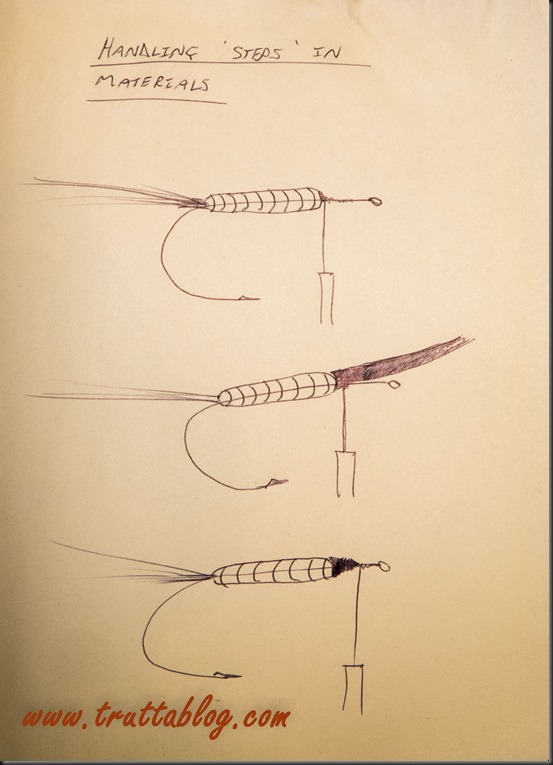
When tying in materials, and this applies in particular to bulky materials, you need to handle steps in the diameter of the thread base.
If you tie in a bunch of thick deer hair, and trim the butt ends in a straight line, you will probably have a wide diameter zone over the butt ends, dropping in a step to the smaller diameter zone where you have only thread around the shank.
This is depicted in the top sketch :
A sudden step like this can be managed: You can leave it as a step, and wind one material on the “high ground” and another on the “low ground”, as depicted in the centre sketch above. Watch Davie McPhail do this (watch from 8 mins into the video to about 9 mins 45)
Alternatively you can build up thread to make the base even, or manageably sloped as depicted in the bottom sketch.
If you choose to trim the waste materials at an angle to create a tapered base to work on, that is fine, but be aware that a steeply tapered base will still cause problems as materials wound onto it may slip down the cone shape. Either consider working on a step by building up thread in front of it, or put a thin base of superglue and wind carefully onto the glue brushed, steeply tapered base.
Steps and tapers close to the hook eye are invariably problematic, and should be avoided completely by tying materials well back of the eye. If you have a step or taper problem close to the eye of the hook, you probably haven’t left enough space for the head of the fly in the first place.
“lay flat threads” are also preferable, and there is the aspect of deliberately creating a step to splay materials, but I will get into that in another post.
(One step at a time!)
